Rear Disc Brakes
When I first MOTed after the rebuild, I had problems with rear brake imbalance. My brand new rear brake cylinders had leaked and polluted the new brake shoes. I fixed the problem, but I learnt to hate drum brakes and resolved to swap to disc brakes as soon as was practical. You can buy off-the-shelf kits quite easily but they are horrendously expensive. I thought I could make my own conversion on a budget
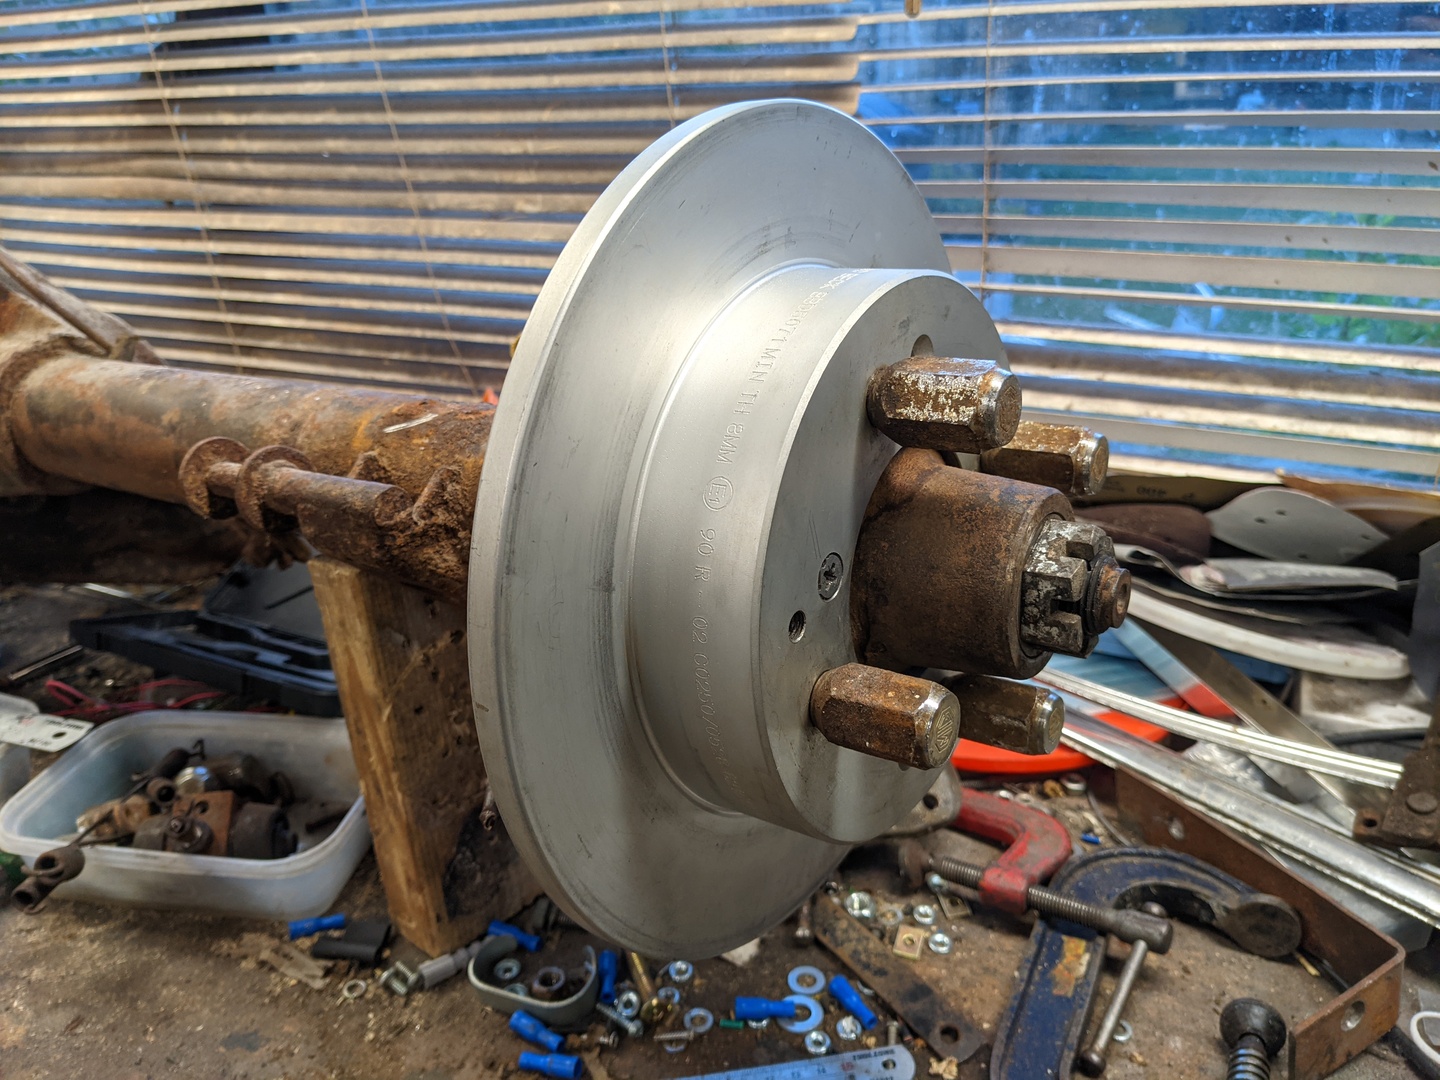
To swap to discs, you need 3 main components. The disc itself, the brake caliper and the bracket to bolt the caliper to the axle.
The Disc
The trick for a successful conversion is to find a disc that has the same bolt pattern, is small enough to fit inside the 14” wheel, has the correct offset so that the caliper will fit behind the wheel and provides approximately the same level of braking effort as the drums. Research of the ATE brake catalog showed that there were 3 main candidates that would possibly work :-
Volvo
These discs will bolt on without modification but are too shallow so caliper clearance is an issue for factory wheels. They may be ok if you’re running larger aftermarket wheels.
Hyundai/Kia
These discs will also bolt on without modification and are very deep so there would be no caliper clearance problems. However, they are designed with a built-in drum for the handbrake mechanism (which we wouldn’t use) so the disc braking surface is rather slim. The brake pads for my chosen caliper overlap the edge of these discs so they’re clearly not a viable option.
Honda
These discs are not a direct bolt on fit but are in all other respects the perfect choice. The depth of the braking surface is deeper than the Volvo disc but not as deep as the Kia disc, but they’re deep enough for the caliper to snugly fit behind my 14” LE alloy wheel and the braking surface area is just right for the pads of my chosen caliper. However, the centre bore needs enlarging to 3” with a hole saw. This is easier than it sounds because the metal is relatively soft. You’ll need to create a jig so that you drill it centrally, but is quite achievable with a hand drill. If you want to, you can also drill two countersunk holes for the grub screws.
The Borg & Beck part number of this disc is BBD5071 and is used on the 1996-1998 Honda Accord and 1993-1999 Rover 600.


The Brake Caliper
There’s several candidates for the brake caliper. The guys in USA tend to use Nissan parts (Sentra 34mm piston or 200sx 38mm piston). However, in Europe, the Lucas caliper for an MG-F or MG-TF (38mm piston) is a better choice. The caliper handbrake mechanism is also a better layout for this conversion because they pull inwards in the same direction as the drum brakes rather than towards the front of the car.
Warning. My brake pads came with anti-squeal shims attached however they prevent the outer pads from contacting the disc squarely. Make sure to remove them!

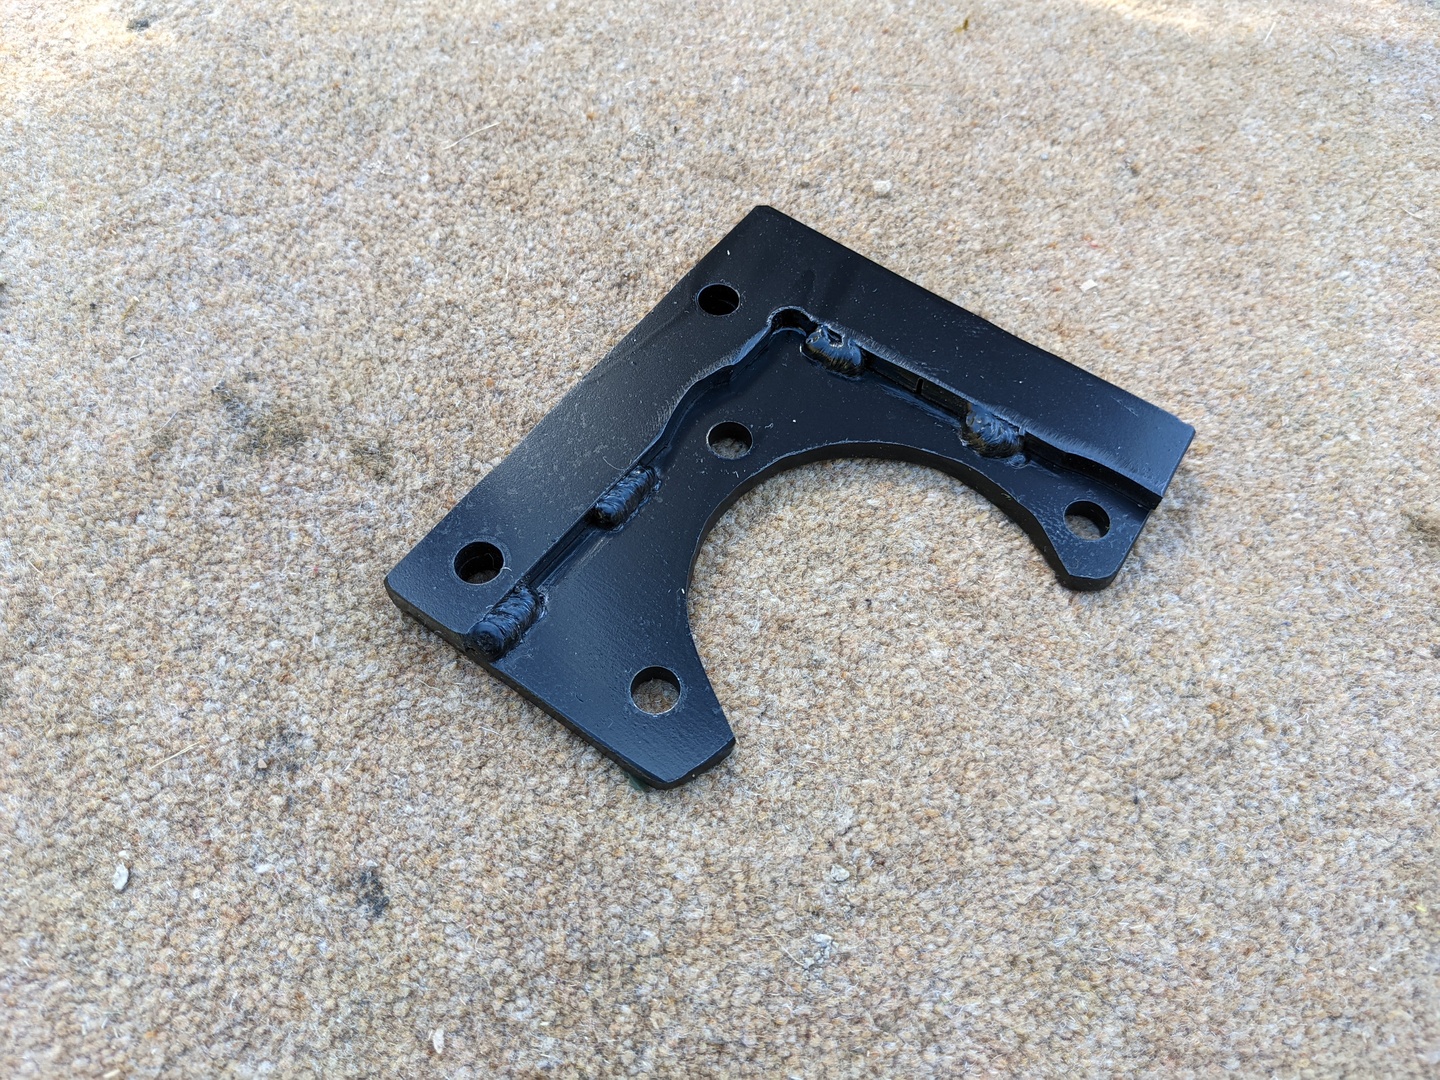
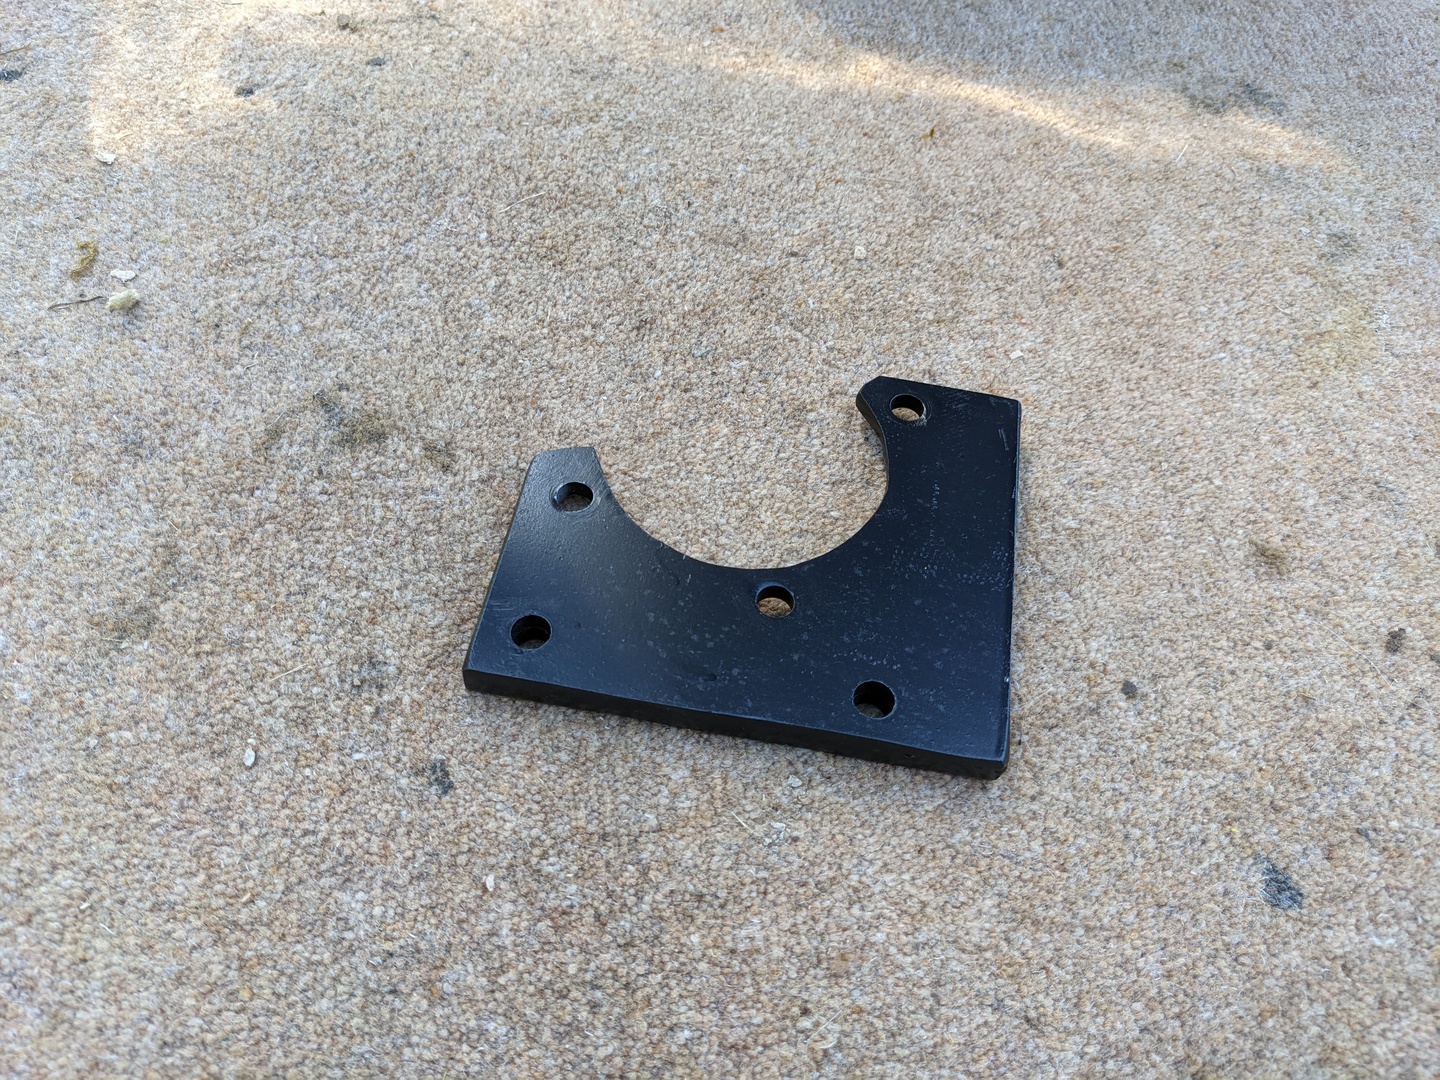
The Mounting Bracket
The mounting bracket is a custom part. You’ll need to make these yourself or get someone to make them for you. These should be made in 2 parts - the bracket to locate the caliper relative to the axle and a 6mm thick spacer to locate the depth of the caliper relative to the disc. I welded these two parts together to improve strength of the part as a whole. Apart from the obvious welds, I also welded these along the edges by grinding an angle and welding inside the resulting vee. If you do this, be careful of heat distortion.
The Brake Hoses
Now that you’ve got the discs fitted and got the calipers mounted to the axle, you’ll need to plumb them in. Your brake drums only needed hard lines to connect to the brake slave cylinder but your new calipers are sliding calipers so they’ll move during normal operation. This means that you’ll need flexible brake hoses. You’ll need to get these made or make them yourself using a self-build brake kit.

Handbrake Cable
The handbrake mechanism on these Lucas calipers pulls inwards much like the drums do on an MGB. The ends of the standard MGB brake cable attach to the calipers in much the same way. You can use the standard cable and compensator but the cables need shortening by about 1.5-2”. It’s possible that a wire-wheel cable will be the correct length if used on a steel wheel car. If you shorten the cables, it’s important that you clamp or crimp the ends securely so that the cable doesn’t slip.
You’ll also find that the handbrake lever ratio is not quite enough to pull the handbrake 100%. No amount of adjustment will change this. To fix this, you’ll need to remove the handbrake lever and remove the lower part where the adjuster attaches. This will then need extending by approx 10mm. This will cause the cable to be pulled further for a given amount of handbrake application. Mine now fully engages after about 6 clicks.